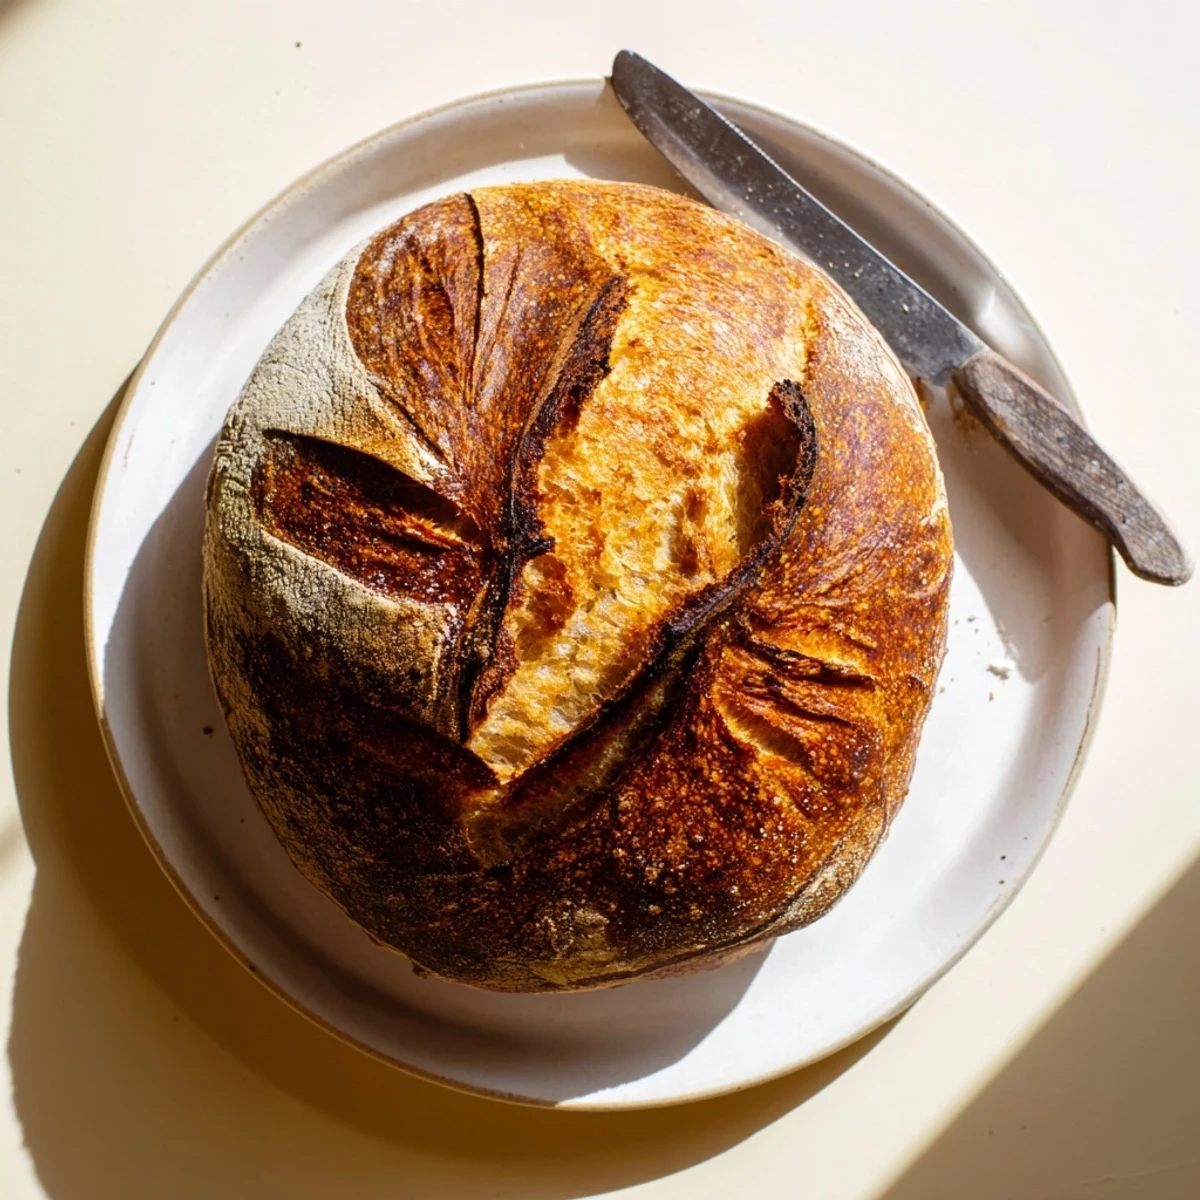
 Pin This
 This traditional sourdough captures wild yeast's magic through patient fermentation. The lengthy process develops distinctive tanginess and complex aromas while creating a bakery-quality crust. Expect substantial hands-on time mixed with patient waiting periods. Your reward: an artisan loaf rivaling professional bakeries, featuring exceptional texture and depth. Perfect for those seeking authentic bread-making experiences with minimal equipment.
The smell of sourdough baking on a rainy Sunday morning has become the single most reliable comfort in my kitchen. Something about the tangy aroma filling the house makes even the dreariest winter day feel cozy and complete. I started baking bread during a particularly stressful month when kneading dough became my therapy. Now I cannot imagine a week without a loaf cooling on the counter.
Last winter my sister visited and we ate an entire loaf warm from the oven with nothing but salted butter. We stood at the counter picking at pieces, the steam still rising, and agreed it was better than any bakery bread we had ever tasted. She still texts me on baking days, half joking about coming over for dinner.
Ingredients
- Bread flour: Higher protein content than all purpose flour gives you that beautiful open crumb structure and chewy texture
- Water: Room temperature water helps the starter activate quickly without shocking it
- Active sourdough starter: This is your wild yeast culture, make sure it is bubbling and doubled before using
- Fine sea salt: Fine grain dissolves evenly into the dough, coarse salt can leave salty pockets
Instructions
- Mix and rest:
- Combine flour and water in a large bowl until no dry flour remains. Cover with a damp towel and let the mixture rest for one hour. This autolyse period gives the flour time to fully hydrate.
- Add starter and salt:
- Add your bubbly sourdough starter and salt to the bowl. Mix with your hands, squeezing the dough through your fingers until everything is evenly incorporated and the dough feels cohesive.
- Build strength:
- Perform four sets of stretch and folds every thirty minutes for two hours. Grab one edge of the dough and pull it up high, then fold it over the center. Rotate the bowl and repeat until all sides have been stretched.
- First rise:
- Cover the bowl and let the dough rest at room temperature for four to six hours. The dough should roughly double in size and look puffy with small bubbles on the surface.
- Shape the loaf:
- Turn the dough onto a lightly floured surface. Fold the edges toward the center to create tension, then flip and shape into a tight round or oval loaf.
- Cold proof:
- Place the shaped dough seam side up in a floured proofing basket. Cover and refrigerate for eight to twelve hours. This cold fermentation develops incredible flavor.
- Preheat oven:
- Place your Dutch oven in the oven and preheat to 230°C (450°F). Let it heat for at least thirty minutes so the pot is screaming hot.
- Score and bake:
- Gently turn the dough onto parchment paper and use a sharp blade to score the top. Transfer into the hot Dutch oven, cover, and bake for twenty minutes. Remove the lid and bake another twenty minutes until deep golden brown.
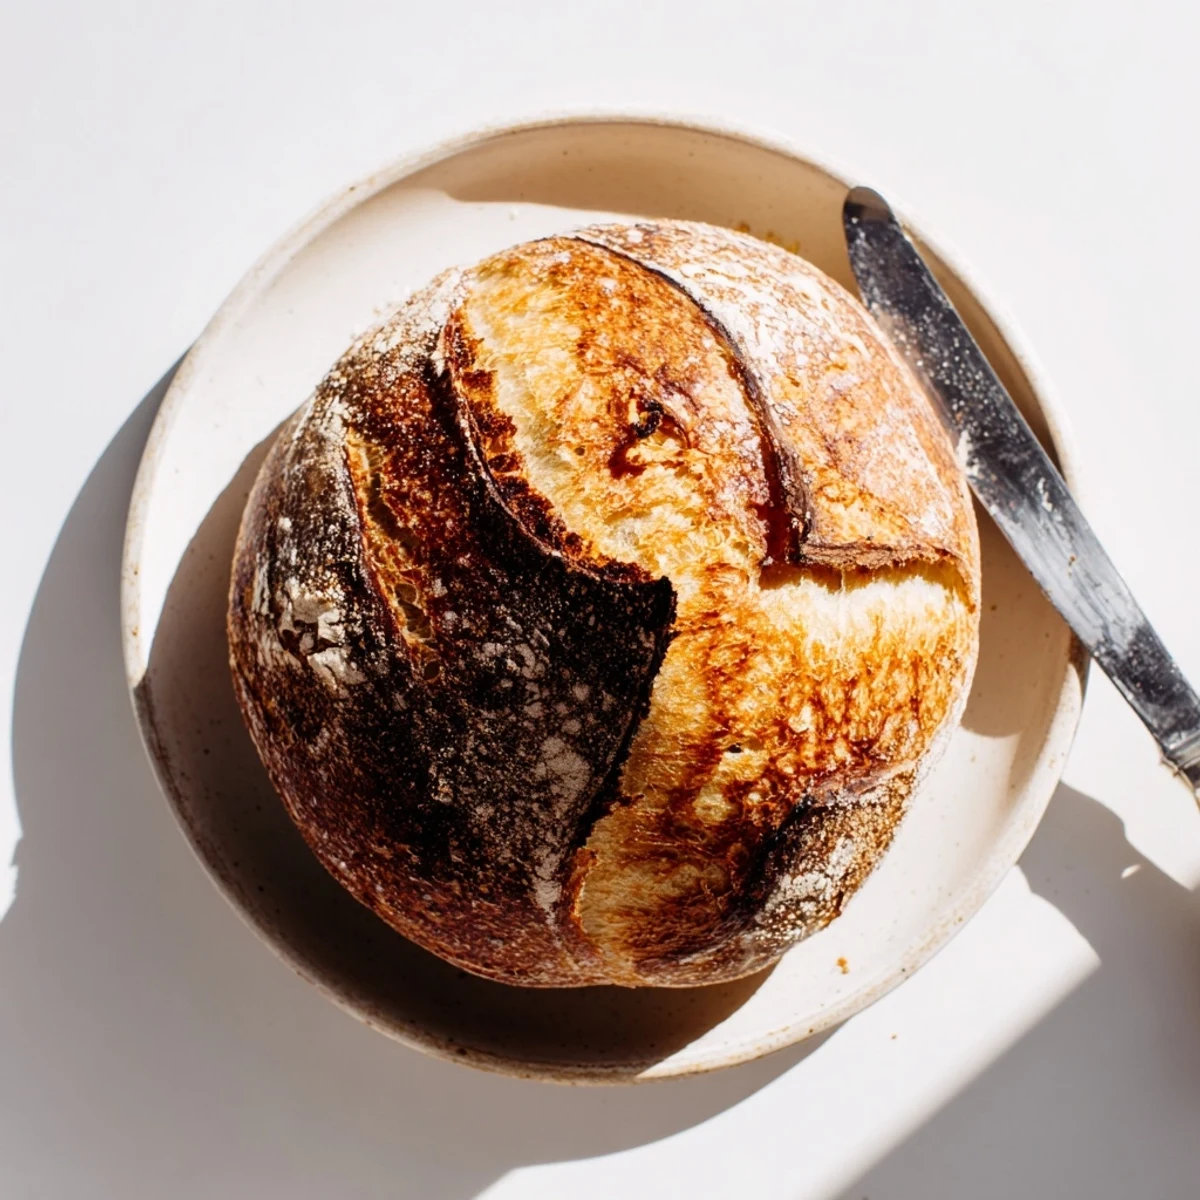 Pin This
 This bread became the centerpiece of every dinner party I hosted last year. Friends started asking when they could come over for bread night, and eventually I began keeping extra starter just to share. There is something profoundly satisfying about serving something you nurtured over twenty four hours.
Understanding Your Dough
Learning to read your dough takes time but makes all the difference. The windowpane test, where you stretch a small piece of dough until it is translucent, tells you if you have developed enough gluten. Underworked dough will tear immediately, while properly developed dough will stretch thin without breaking.
Creating Steam
The Dutch oven method creates a mini steam chamber that gives your loaf that professional bakery crust. The trapped steam keeps the exterior soft during the first twenty minutes, allowing maximum oven spring before the crust sets. This simple technique transforms home baked loaves into bakery quality bread.
Storing and Slicing
Let your bread cool completely before slicing, at least one full hour. Cutting into warm bread releases steam and can make the interior gummy. Store cut side down on a cutting board for two days, then freeze slices wrapped in foil and frozen in a freezer bag.
- Revive day old bread by sprinkling with water and reheating at 180°C (350°F) for ten minutes
- Stale sourdough makes exceptional french toast or bread pudding
- Never store bread in the refrigerator as it accelerates staling
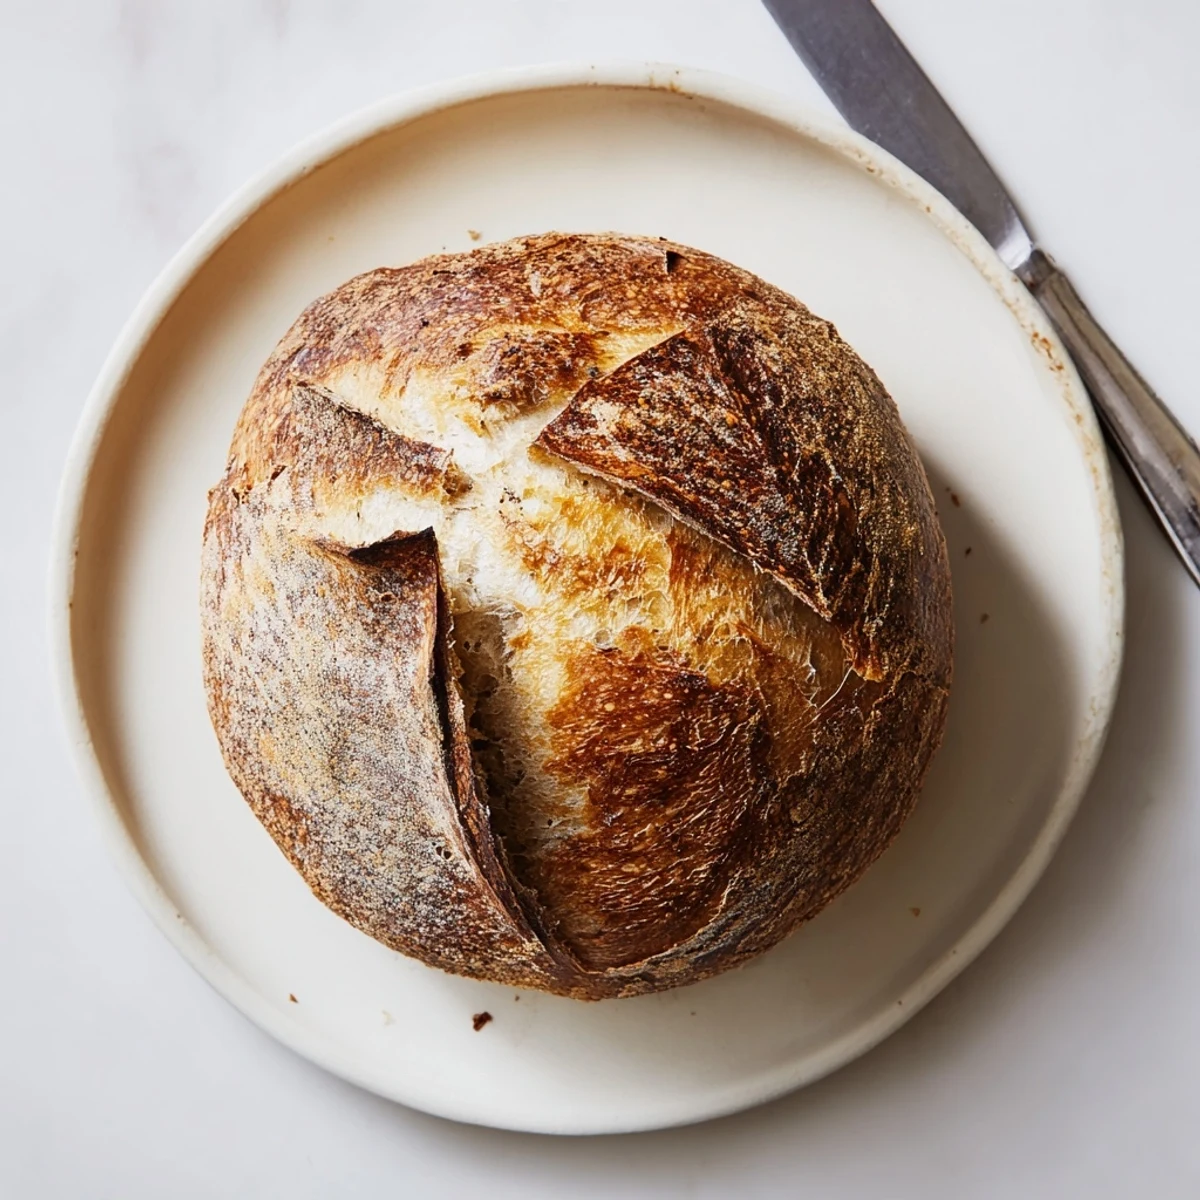 Pin This
 There is nothing quite like the first slice of warm sourdough with a generous slather of butter. Take your time, trust the process, and enjoy the most rewarding bread you will ever bake.
Recipe FAQs
- → What makes sourdough different from regular bread?
-
Wild yeast fermentation creates distinct tangy flavors and improves digestibility. The longer rising process breaks down gluten naturally, resulting in better texture and nutrient absorption compared to commercial yeast breads.
- → How do I know when my dough is properly proofed?
-
Gently press the dough with your fingertip. If the indentation slowly springs back halfway, it's ready. The dough should appear puffy with visible air bubbles beneath the surface and have increased noticeably in volume.
- → Can I bake this without a Dutch oven?
-
A Dutch oven creates steam for optimal crust development. Alternatively, place a metal tray on the bottom oven rack while preheating, then pour ice cubes into it when you load the dough to generate steam.
- → Why does my starter need to be 100% hydration?
-
Consistent hydration ensures predictable results in your dough. 100% hydration means equal weights of flour and water in your starter, which helps calculate overall dough hydration and maintain proper fermentation.
- → What causes a dense crumb instead of an open one?
-
Under-proofing, insufficient gluten development, or cutting too early can create density. Ensure proper stretch-and-fold technique, allow full fermentation time, and always let your loaf cool completely before slicing.